A Spellbinders Merry Little Christmas Card
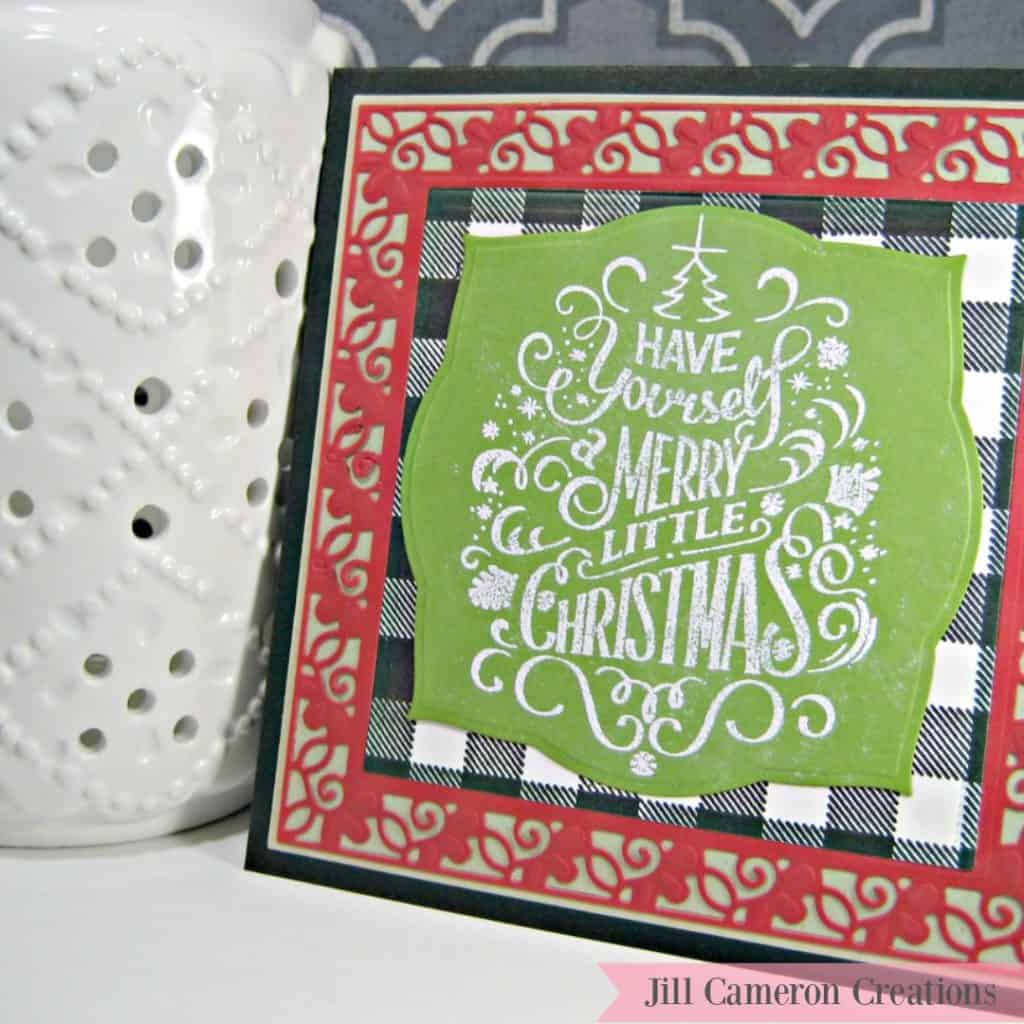
Plaid is super popular right now and I wanted to create a Christmas card with something plaid. I had recently subscribed to Spellbinders Monthly kit. There’s several to choose from and you can check those out here. I usually make A2 size cards but for this one I really wanted to create a square card. The Floral Lace Frame in the Large Die kit just worked perfectly! Thus, A Spellbinders Merry Little Christmas Card is born!
Affiliate Disclosure Policy
This post contains affiliate links for your convenience. This means if you make a purchase after clicking a link, I will get a small commission with no additional cost to you as the consumer. Jill Cameron Creations/Jill Lipscomb participates in the Amazon Services LLC Associates Program, an affiliate advertising program designed to provide a means for sites to earn advertising fees by advertising and linking to Amazon.com. For full disclosure policy click here.
A Spellbinders Merry Little Christmas Card
This is a 5 1/2 x 5 1/2 inch card with a black cardstock base.
Then, I used my Spellbinders Platinum to die cut and emboss a piece of Desert Storm Neenah cardstock with a Matting Basics 6 x 6 die, red cardstock with the Floral Lace Frame die, and green cardstock with an old label die I found in my stash.
Next, I set up my MISTI with the new Concord & 9th Plaid Background stamp. This background stamp is large and requires a little muscle to get a clean stamped image. It was stamped in black ink on Neenah Solar White 80lb cardstock. I stamped it several times to get it nice and dark. In order to ensure the inside square would fit perfectly, I used the Floral Lace die.
I white heat embossed a stamp from Tim Holtz’s Doodle Greetings on the green diecut piece. The image didn’t emboss very well. I could have stamped and embossed the image again however I liked the added texture.
Lastly, I centered everything and stacked it all up. I didn’t use any foam tape or anything; just adhered everything flat down. I did use liquid adhesive to adhere the Floral Lace frame. I love the look of this card. It makes me want to decorate the Christmas tree with popcorn strings and red apples.

