Sometimes you see the name on a stamp set and before you even see the images you just know you have to have it! The Flock Yeah set and the Oh My Gostrich just tickled my funny bone and I had to have them. Both sets arrived on Tuesday (see my June Haul post) and I made a card THAT day. I had to! This card was simple and super quick! You could make several of them at one time if you wanted to have some cute birthday cards on hand. Let’s take a look at this Flock Yeah Birthday Card!
Side Note: The video for this card has a touch more than coloring in it. I bought my second Silhouette Cameo a few weeks ago. So, I wanted to see if I could get good results with the Pixscan feature so I included it in the video. It looks like won’t be purchasing as many dies in the future.
This post contains affiliate links for your convenience. This means if you make a purchase after clicking a link, I will get a small commission with no additional cost to you as the consumer. I participate in the Amazon Services LLC Associates Program, an affiliate advertising program designed to provide a means for sites to earn advertising fees by advertising and linking to Amazon.com. For full disclosure policy click here.
Products Used
- WPlus9 Oh My Gostrich
- WPlus9 Flock Yeah
- Silver Glitter Paper
- Copic Markers RV02, RV04, RV06, RV09, E44, E47, E49, E04, E11, W01, W03, W05, E21
- Silhouette Cameo 3
- Wonky Stitched Rectangle STAX
Also, check out my 15 Can’t Live Without Products in Card Making
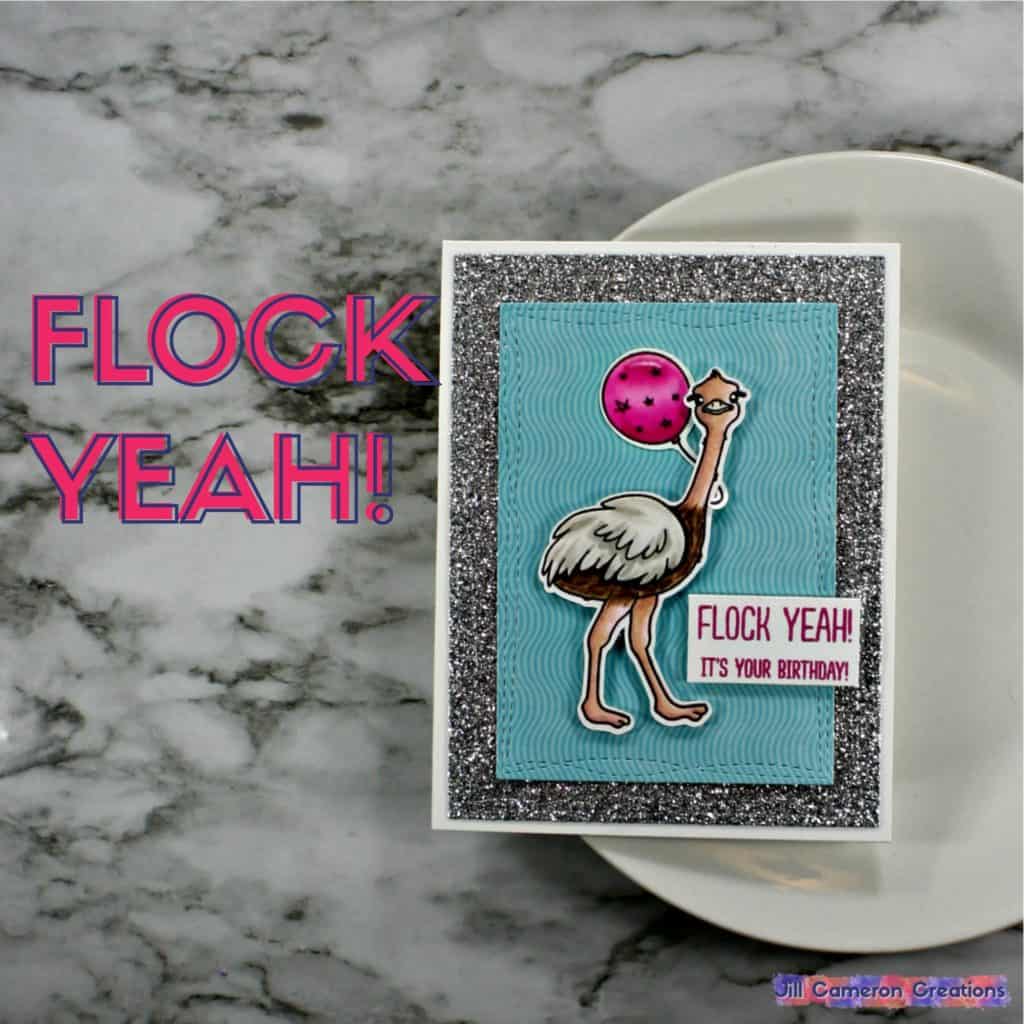
Flock Yeah Birthday Card
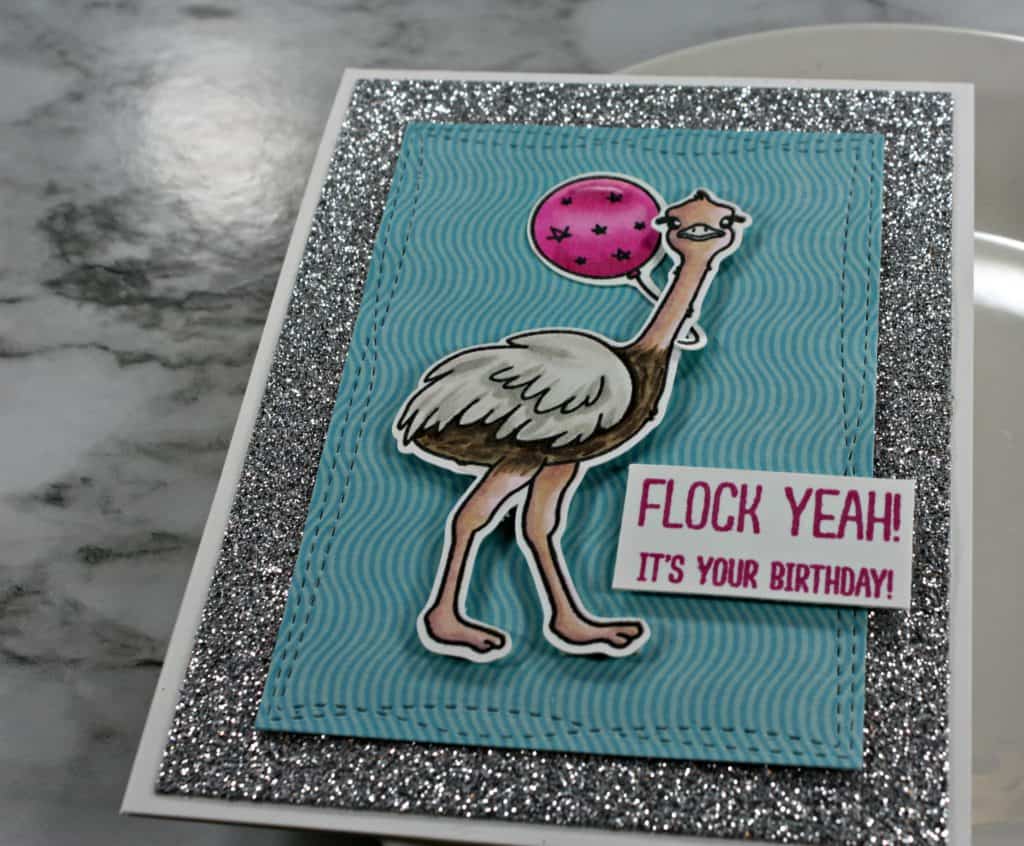
The very first thing I did was squeal with joy, then I started making the card. 🙂 Seriously, I put one of the ostriches from the Oh My Gostrich set in my MISTI along with the balloon. Next, I stamped both images twice in Lawn Fawn Jet Black Ink on to 80lb Neenah Solar White Cardstock. The cardstock panel is 4 1/4″ x 5 1/2″.
Then, I set-up my Silhouette Cameo 3 to cut out the images instead of using dies. (See the video for details on this part.)
After the images are cut perfectly, I colored the balloon in RV02, RV04, RV06, and RV09. I had no idea what colors an ostrich should be so I pulled a picture or two up on my phone. The body is dark, the wings are white, and the legs and neck are an odd pinky color. I used E04 with E11 and RV02 to get the odd pinky color for the ostrich. Check out the video for more details on the coloring.
The card needed to WOW! to go along with the cute image and sentiment so I pulled out some silver glitter paper. That’s something I rarely use. I cut down the glitter paper and a piece of blue wavy patterned paper using the Wonky Stitched Rectangle dies. Then, I mounted both panels on a white card base. Be sure to use glue to attach anything to glitter paper.
Lastly, I used foam tape to attach the ostrich and the sentiment. Check out the video for more details about how this super cute card came together!