Magic Color Slider Easter Card
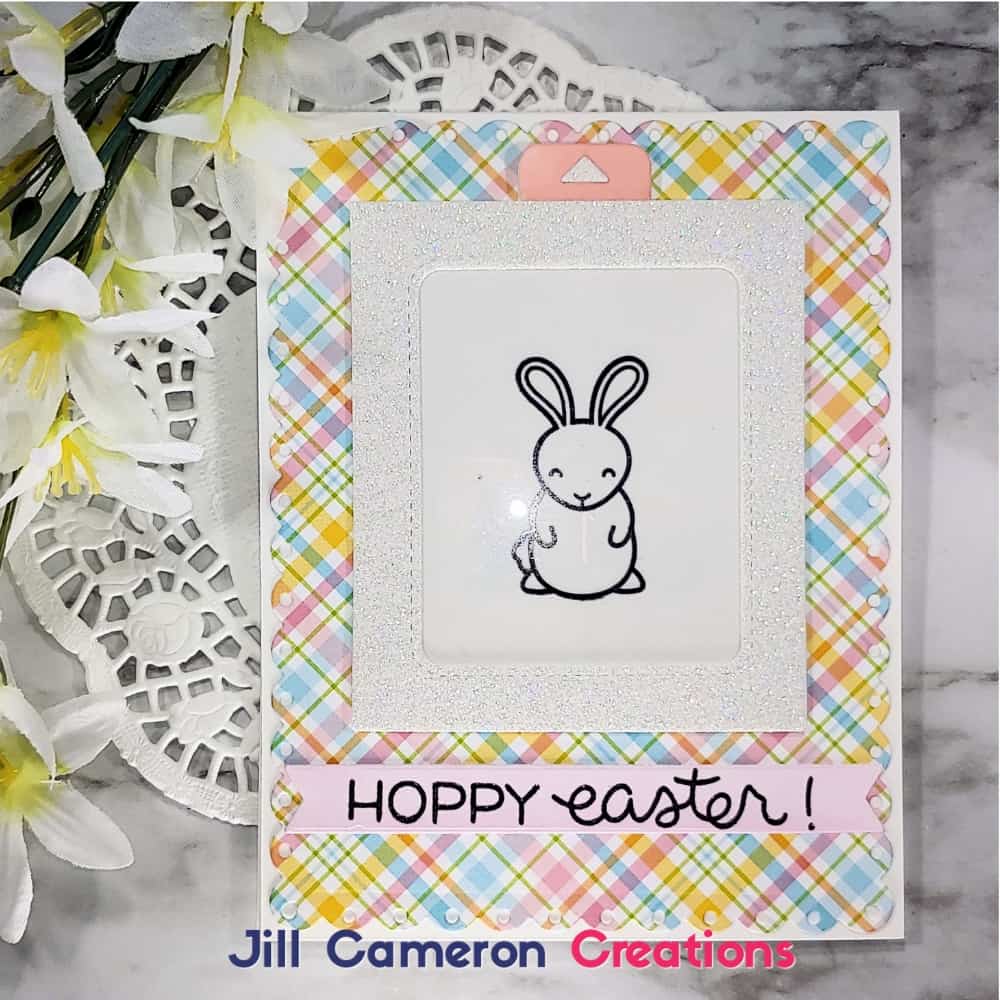
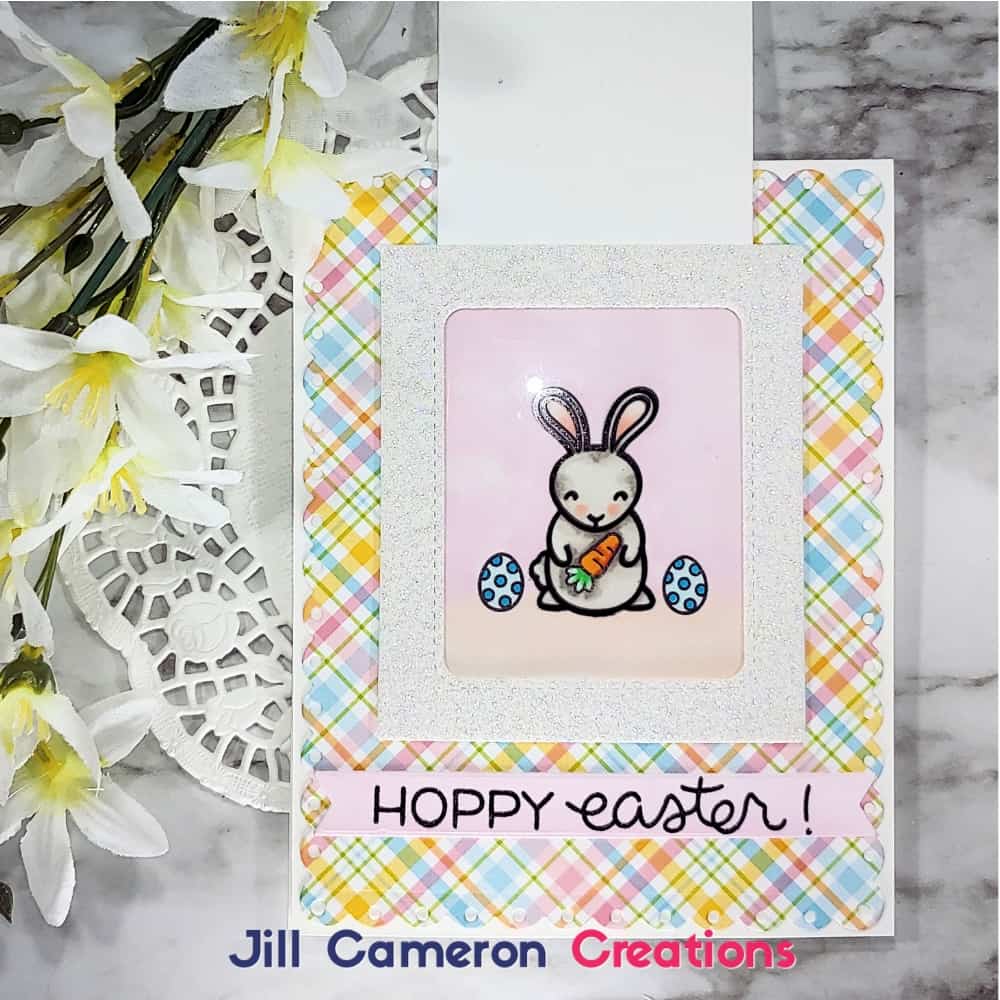
Lawn Fawn makes some pretty AWESOME interactive dies! One of my all time favorites is the Magic Color Slider die set. It is one of Lawn Fawn’s older die sets but I don’t see it going away anytime soon. And today we’re making an adorable Easter card using the Magic Color Slider die set! Cards like this always make me smile big time! Keep reading on for to create this card quickly!
As always, all products are linked at the bottom of this post under the “Supplies Used” heading. There’s also a link to the YouTube video.
Affiliate Disclosure Policy
This post contains affiliate links for your convenience. This means if you make a purchase after clicking a link, I will get a small commission with no additional cost to you as the consumer. Jill Cameron Creations/Jill Lipscomb participates in the Amazon Services LLC Associates Program, an affiliate advertising program designed to provide a means for sites to earn advertising fees by advertising and linking to Amazon.com. For full disclosure policy click here.
Magic Color Slider Quick Tips
Sometimes interactive die sets can be a little tricky. I mean you get all these bits and pieces but you’re not really sure what to do with them. I’m going to share with you some quick tips to make sure you never forget how to create a card using the Magic Color Slider.
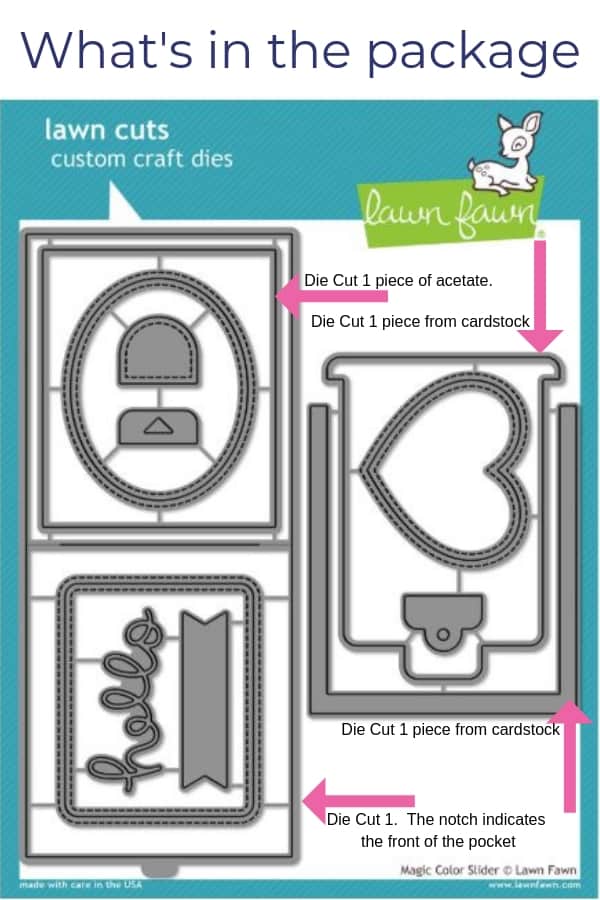
There is one important thing to consider for the creation of the pocket: what kind of paper to use? As you can see I used some white glitter paper to create the pocket. If you aren’t using a paper you can color on (with whatever medium you choose) you’ll need to cut a piece of paper you can color on from the same die that cuts the acetate piece. For example, I added a rectangle of Neenah Solar White so I could Copic color the bunny on the inside of the pocket. That’s tip number one.
Tip two: Use heavyweight cardstock. It’ll make life so much easier and the card will hold up better.
And my last tip is to match the squared off ‘U’ shape to the color of the pocket. If you cut the pocket out of red cardstock then cut squared off ‘U’ shape out of red cardstock.
Steps to create a Magic Color Slider card
- Die cut all pieces. Don’t forget to die cut the window from the front of the pocket. Use one of the double stitched frames included in the die set.
- Adhere acetate to the inside of the front of the pocket. Use 1/8″ double-sided adhesive.
- Insert the slider through the notch in the pocket. Slide it all the way to the top so that it’s hanging out of the top of the pocket.
- Put 1/8″ double-sided adhesive on both sides of the squared off ‘U’ shape. Remove the adhesive backing on one side. Align the bottom corners of the squared off ‘U’ shape to the inside back panel of the pocket. The open ends of the ‘U’ should be just short of the crease of the pocket. Make sure it does NOT touch the slider.
- Remove the slider. If you need that extra rectangle to color an image, adhere it now.
- Using a MISTI, stamp the image on the inside of the pocket and on the acetate. Use Staz-on Ink to stamp on acetate and a Copic friendly ink on the paper.
- Color the image on the inside of the pocket.
- Insert the slider and slide all the way to the top.
- Remove the liner paper from the remaining double-sided adhesive tape and close the pocket.
- Move the slider up and down a few times to ensure proper movement.
Now, finish off your card any way you want! You can keep it super simple like I did or seriously dress it up.
Supplies Used

Don’t forget to Pin this so you don’t forget it!

