Christmas Ornament Concord & 9th Card
Concord and 9th is one of my favorite stamp and die companies. Their products are always unique and innovative. The Christmas Ornament die is large enough to stand on its own for the front of a card. For this card, I also wanted to use some old school craft techniques mixed with some new.
Affiliate Disclosure Policy
This post contains affiliate links for your convenience. This means if you make a purchase after clicking a link, I will get a small commission with no additional cost to you as the consumer. Jill Cameron Creations/Jill Lipscomb participates in the Amazon Services LLC Associates Program, an affiliate advertising program designed to provide a means for sites to earn advertising fees by advertising and linking to Amazon.com. For full disclosure policy click here.
Christmas Ornament Concord & 9th Card
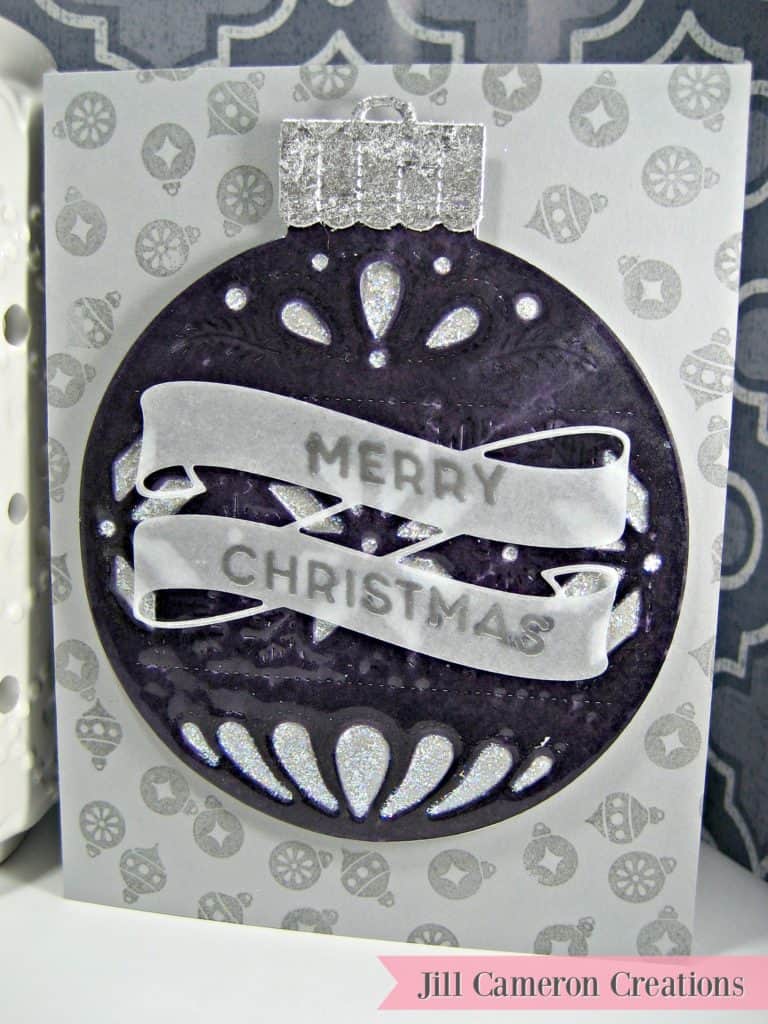
First, I stamped the background panel using the small ornament images from the Concord & 9th set Trim the Tree. I used grey ink on grey paper for a subtle effect.
Ornament
Next, I die cut the main ornament from the Concord & 9th Ornamental Die set from lite purple cardstock. The Ornamental Die set comes with a decorative die to cut out and emboss parts of the ornament. Here’s where the old school technique comes in; I coated the entire die cut with Versamark and poured some Ultra Thick Embossing Enamel over the entire diecut. Then, I melted the embossing enamel with a heat tool. I added three coats of Embossing Enamel. You can add as many coats as you want but just be careful….this stuff gets really hot and will burn you if you stick your finger in it while it’s hot. Notice the light purple cardstock in now much darker with the enamel on top of it.
After I created the ornament, I die cut just the ornament in the same grey cardstock as the background and backed my fancy die cut. Every ornament needs some sparkle so I added silver Stickles in all of the openings. Then, I trimmed down a piece of fun foam for the back of the entire ornament to keep in from flattening out in the mail.
For the top of the ornament die cut piece I coated it with some tape runner (use whatever you normally use) and dipped it in Silver Nuvo Gilding Flakes. Use a stiff bristled paint brush and burnished away all of the extras. Gliding flakes are seriously messy but so worth it!
Sentiment
Lastly, I used the sentiments from the Concord & 9th Christmas Cheer Turnabout set. The sentiments are designed to be used with the Banner die. The Misti definitely makes stamping sentiments a breeze. I use Versamark ink on some vellum then, covered it with silver embossing powder and used my heat tool to melt it. Liquid glue hidden behind the letters on the vellum works great to adhere the sentiment banner on the front of the ornament.
This is a beautiful shiny card with so much texture!

