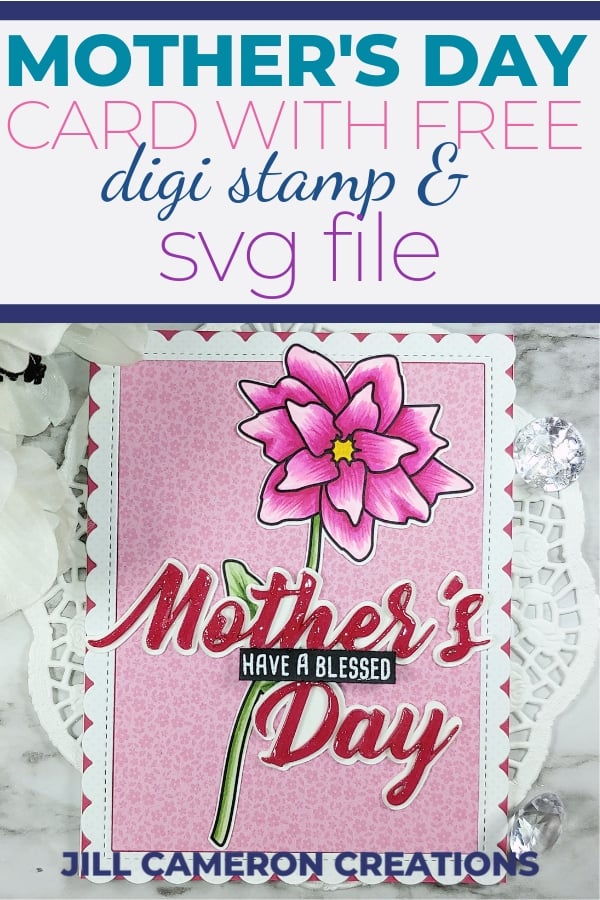
Mother’s Day Card Print & Cut
Mother’s Day is just around the corner and I’ve created a special Mother’s Day card Print and Cut just for you! This Print and Cut is a little different than most because I created the image as a digi stamp so you could color it however you want to color it. Also, this is the first of what I hope is many more digi stamps to come.
The products used are at the bottom of this post.
Affiliate Disclosure Policy
This post contains affiliate links for your convenience. This means if you make a purchase after clicking a link, I will get a small commission with no additional cost to you as the consumer. Jill Cameron Creations/Jill Lipscomb participates in the Amazon Services LLC Associates Program, an affiliate advertising program designed to provide a means for sites to earn advertising fees by advertising and linking to Amazon.com. For full disclosure policy click here.
The digi stamp is the flower and there’s also the sentiment. As you can see the sentiment is already sized for an A2 size card front.

Mother’s Day Card Print & Cut
A few things to note about creating this card.
- Be sure to print this with the registration marks. Go to Page Setup > Click on Registration Marks > Next to Style, select Type 1 for Cameo, Portrait, Curio
- To get more dimension from your die cut sentiment, cut it out at least three times just like you would if you were using a metal die and hand crank die cutting machine.
- Be sure the Overcut feature is turned on to get crisp cuts in the corners.
- Don’t make the flower image a Compound Path or you’ll lose the layering of the petals.
- Move the sentiment off of the mat area in Silhouette Studio when you print the flower. The sentiment lines will print if you don’t.
- Print using an inkjet printer if you’re going to color with alcohol based markers.
Steps to create this card
First, print the flower (with registration marks on the paper). Color the image with whatever medium you’d like to use. Next, place the paper in the very top, left corner of your cutting mat. Load the mat into your Cameo 3 and send the project to cut. Be sure that your cut settings are correct for the material you’re using and Overcut is turned on.
Now, cut the sentiment and shadow sentiment in coordinating cardstocks. I cut my sentiment three times so that I could get the dimension on the card.
Add whatever stamps and other sentiments you’d like.
Check out the video for this card! It has tips on how to remove things from the cutting mat without curling your paper.
Check out my post on First Cut with Silhouette if you’re having trouble with getting good cuts.
See more Silhouette Projects
Silhouette Cut Settings – Overcut
Use Silhouette Studio with Digital Stamps
Foil Quill Designs