Use Border Dies to Create a Background
For some reason, I love to make Valentine’s Day cards but I never send them out. I know it’s crazy but that’s okay. Today, we are going to use border dies to create a background for a card. This technique takes a few minutes but not terribly long and the results are amazing! the best part is you can use all kinds of border dies to do this.
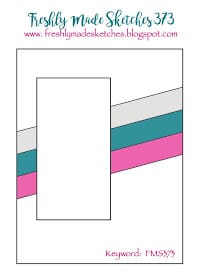
The thing I’d like to talk about real quick is that I’m doing this particular card as part of the Freshly Made Sketches Challenge. Challenges are a great way to stretch your creative muscles. Below is the sketch for this challenge.
Affiliate Disclosure Policy
This post contains affiliate links for your convenience. This means if you make a purchase after clicking a link, I will get a small commission with no additional cost to you as the consumer. Jill Cameron Creations/Jill Lipscomb participates in the Amazon Services LLC Associates Program, an affiliate advertising program designed to provide a means for sites to earn advertising fees by advertising and linking to Amazon.com. For full disclosure policy click here.
Use border dies to create a background
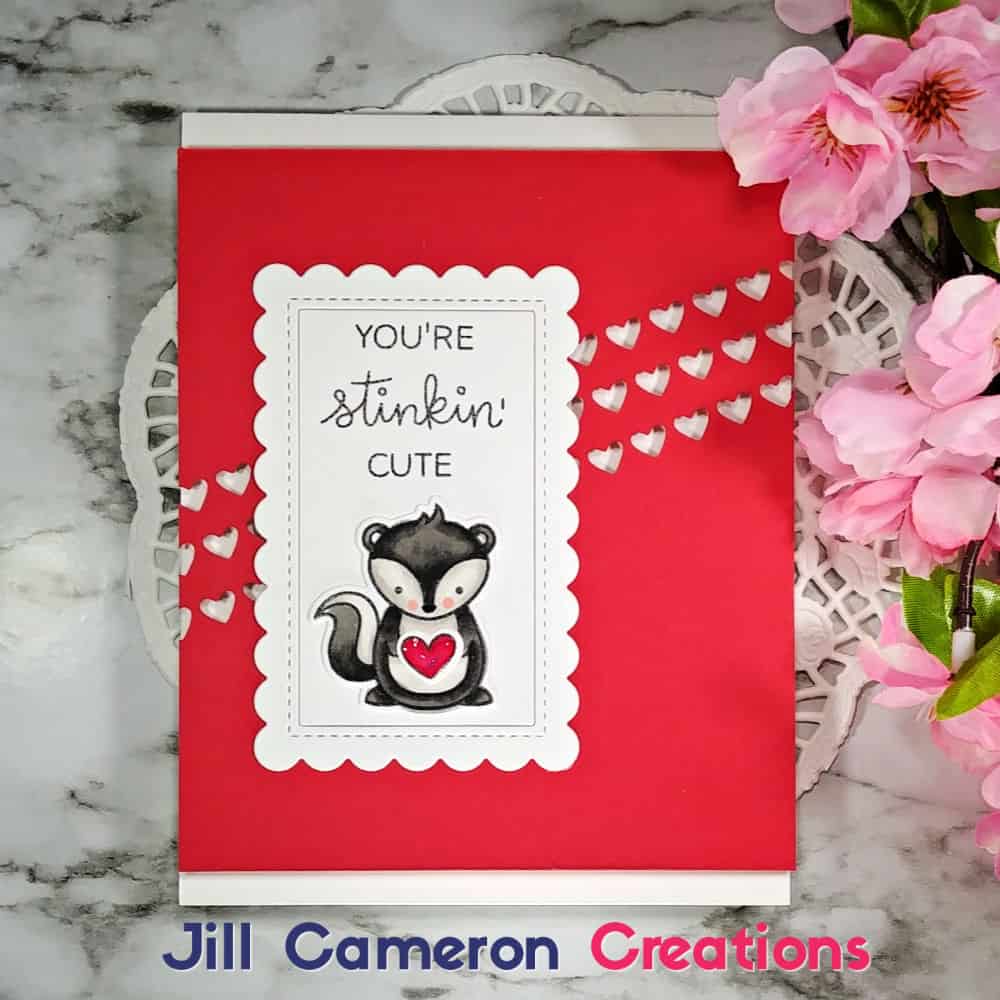
Here’s the most important part of this technique: simple dies work best but almost any will work. There are some border dies that will cut the paper into two pieces and you can use those too. If you use a border die that cuts the paper clean in two then it’ll just take a bit longer to create your panel. You’ll need to basically reassemble the card panel.
What should you do first? Select your border die! Ha! That was way too simple, wasn’t it? No seriously. Test out the die on some scrap paper and make sure it does what you think it does. Sometimes I forget what exactly a border dies looks like when cut.
Now decide on your placement. If I had not seen this week sketch challenge I wouldn’t have thought to put my die diagonally. My brain mostly thinks in straight lines. (This is why I like sketch challenges.) Place your die and start to die cut.
Are you going to pop up the panel on a card front? What product is going to suit your needs best? You have everything from white craft foam to rolls of foam tape to thin foam squares.
There’s another technique you can do with border dies to create interest in the background. You can dry emboss using a die and an embossing mat. Set-up your machine as if you were going to use an embossing folder. Instead of use the folder, use an embossing mat. I find it works best when I place the die (cutting side up) on the base plate, my paper, the embossing mat, and then the top plate. Every machine is different.
Check out more clean and simple cards Clean and Simple Embossed Card and 5 Clean and Simple Christmas Cards.

Want to remember this little trick when creating your next card? Pin it! Click Here!
This card is so fun! I just love that little skunk! He’s so sweet! Love your colouring! Those diecut hearts are perfect! Thanks for joining us this week at Freshly Made Sketches!
Thanks Jen! I love doing challenges! They stretch my creativity. 🙂
This card is stinking cute! Love the heart borders. Thanks for sharing with us at FMS!
And this card is stinkin’ cute! Adorable Valentine! Glad you joined us at FMS!