Layering with Spellbinder’s Dies
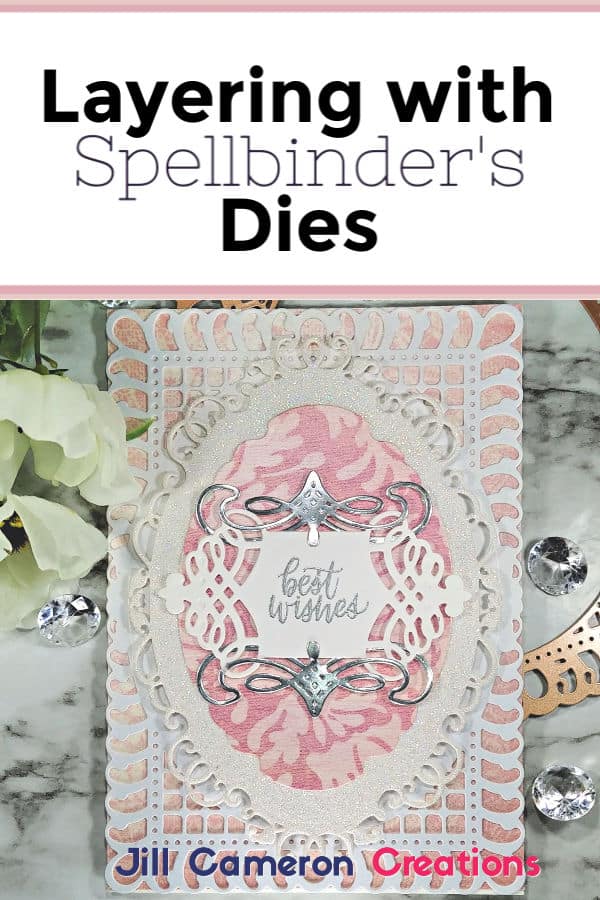
I love those fancy layered cards that use Spellbinder’s dies. These kinds of cards aren’t the cards I usually make. Layering with Spellbinder’s dies is seriously outside of my card making realm. So, I gave it try and guess what?! I Loved how this card turned out. This card isn’t something that would be easy to reproduce in mass but it is perfect for a special occasion.
Let’s take a look at some tips & tricks I learned while layering with Spellbinder’s dies.
Affiliate Disclosure Policy
This post contains affiliate links for your convenience. This means if you make a purchase after clicking a link, I will get a small commission with no additional cost to you as the consumer. Jill Cameron Creations/Jill Lipscomb participates in the Amazon Services LLC Associates Program, an affiliate advertising program designed to provide a means for sites to earn advertising fees by advertising and linking to Amazon.com. For full disclosure policy click here.
Layering with Spellbinder’s Dies
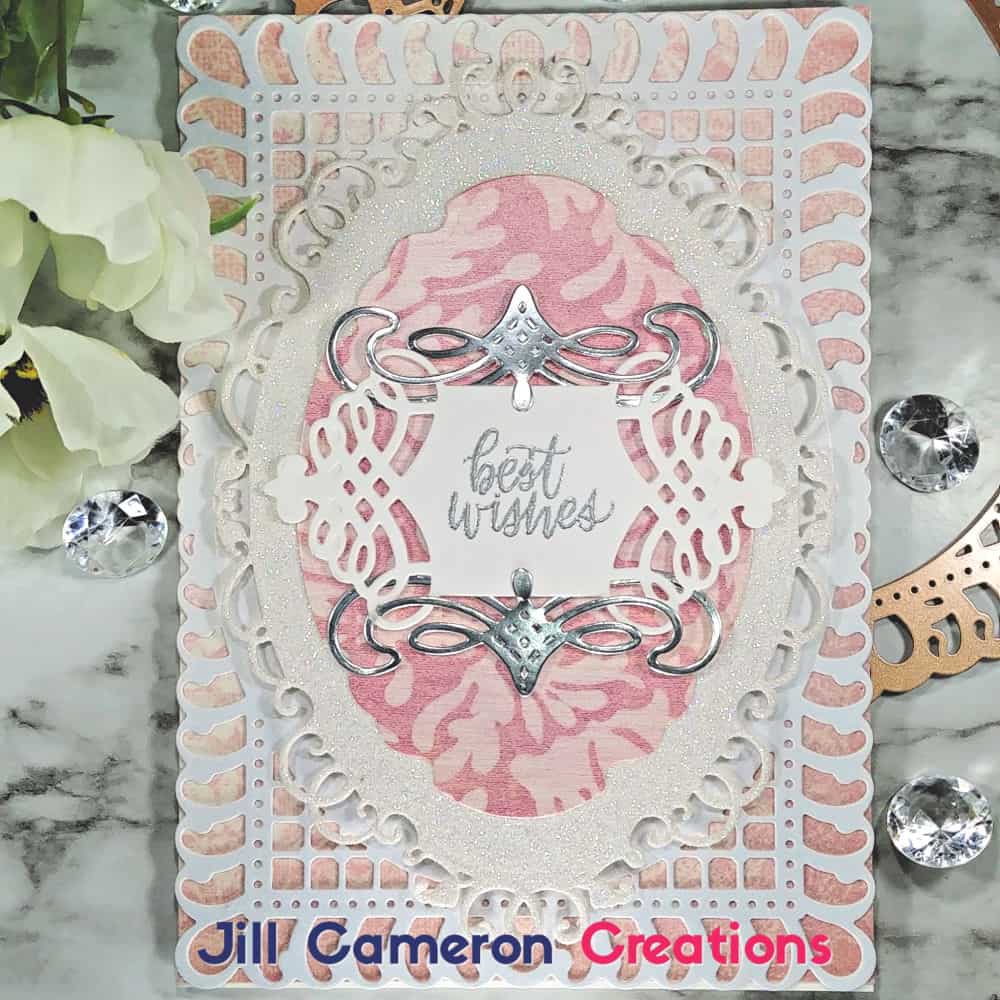
First, I die cut all of the things! Seriously! I pulled out some cheap cardstock and die cut all of the different dies. This allowed me to check out how the dies cut and what I liked layered together. The other method is to just layer the dies on top of each other like I do in the video (linked below).
Second, make notes about which
Now, check out some inspiration over on Spellbinder’s website and on YouTube. Yana Smakula has some great videos using Spellbinder’s dies.
I show the entire process of creating this card in my video. As I said previously, layering with Spellbinder’s dies is just out of my usual style. I seldom use specialty papers or make a card this large. It’s a big honking card!
Here’s a couple of tricks to make this card the best it can possibly be:
- Use a heavyweight cardstock for the base. There are LOTS of layers to these cards and you want the card base to be able to handle it and not bend.
- Add more than one layer of cardstock for delicate dies. This ensures nothing will get bent or torn when mailed.
- The sentiment isn’t really the star of this show, the card is. Keep the sentiment simple and in theme with the card. Don’t use an old typewriter font for a fancy card.
- Don’t be afraid to add patterned paper. It’s the perfect opportunity!
- Add foam tape or craft foam between layers. This will take the card from “oh isn’t that pretty.” to “Wow! That’s amazing!”
- These are the perfect cards to use some of those specialty papers you know you’re hoarding. Pull those beauties out and make an amazing card!
In the video I mentioned the pearl paper I purchased at Michael’s Craft Store. Well, I found it! YAY! It’s 100 sheets and I used a 50% coupon when I got it. Here’s the link.

Want to remember these tips for your next card project? Pin it! Click here!
