How-to Use the Foil Quill in Card Making
We R Memory Keepers introduced a new toy back in January called the Foil Quill. I finally got my hands on a set of all three quills! I’m SOOOOOO excited about this product. I love it almost as much as I love Copic coloring. Almost.
What exactly is this Foil Quill? The Foil Quill set is an accessory for just about any digital cutting machine. In my demonstration, I’m using a Silhouette Cameo 3. These little beauties allow you to add foil to any project. Here’s what’s in the combo pack:
- 3 Foil Quills – 1 fine point, 1 medium point, 1 bold point
- 3 rolls of heat transfer foil in silver, gold, and rose gold
- 1 roll of washi tape
- 1 heat shield
- 4 adapters for various digital cutting machines
You can foil a ton of different materials with the Foil Quill. Pretty much if you can run it through a digital die cutting machine then you can foil it! That’s just awesome! Links to all of the products can be found at the bottom of this post.
Affiliate Disclosure Policy
This post contains affiliate links for your convenience. This means if you make a purchase after clicking a link, I will get a small commission with no additional cost to you as the consumer. Jill Cameron Creations/Jill Lipscomb participates in the Amazon Services LLC Associates Program, an affiliate advertising program designed to provide a means for sites to earn advertising fees by advertising and linking to Amazon.com. For full disclosure policy click here.

How-to-Use Foil Quill in Card Making
I ran a bunch of different tests while I was figuring out this new toy. I tried several different settings and what gave the best results. Most all of my projects are on card stock weight papers so I wanted to make sure I knew how to get that right. If you’re planning on foiling on any other materials, you’ll need to do some experimenting of your own or research online to find the info.
I found the most important thing about the entire process was to make sure the Foil Quill was hot. Give it at least 5 minutes to heat up to the proper temperature. I found that if I did this, then the standard settings worked just fine.
If you find that you’re not getting great results, the first thing to change is the speed. Slow down the speed for the setting without changing anything else. Then change the force. If none of that works, add a shim behind the paper you are foiling.
The second most important thing to get good results is to tape down the foil all the way around. Don’t skimp on this part. Pull the foil as taught as you can and make sure it’s as smooth as possible.
In the video I die cut the cross I foiled. If you hold down the foil, it works just fine. I didn’t have any issues. If it’s a complicated design I would recommend removing the foil before die cutting.
So what about the card??
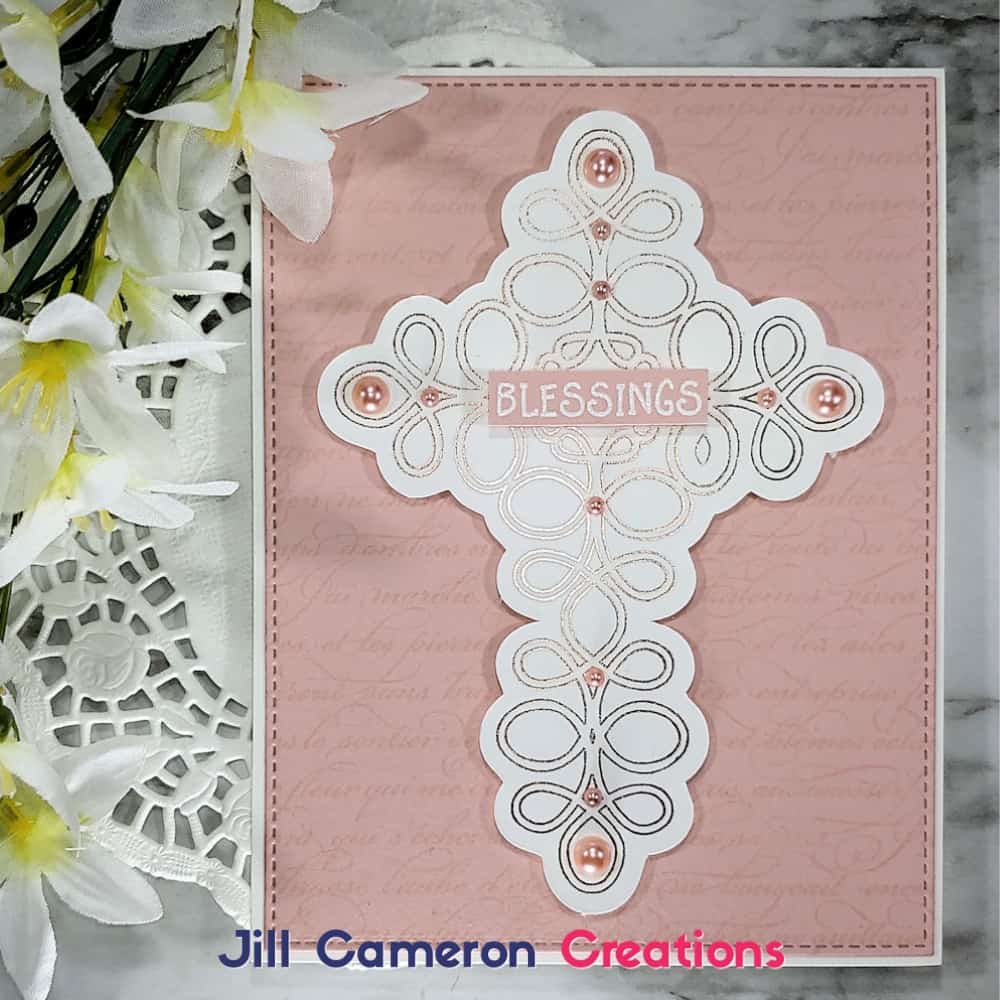
In the video linked above I created an element to add to my card. Because I die cut the cross (I purchased the Ornate Cross in the Silhouette Design Studio) I was able to pop that bad boy with some foam tape and add just like any other die cut.
Then I went about creating it just like any other card.

See more Silhouette Projects
Silhouette Cut Settings – Overcut
Foil Quill Designs
Custom Stencils for Cards



2 Comments
Comments are closed.