How-to: Create Digital Stamp Background Paper
How do you create digital stamp background paper? It’s easy! The best part about creating your own digital stamp background paper is just how creative you can be with it. I used an adorable digital stamp from 2 Cute Ink called Boo-tiful Ghost. I just call her Miss Boo. The Boo-tiful Ghost digital stamp from 2 Cute Ink is just perfect to create a digital stamp background. Why? Because it has clean and simple lines.
Let’s take a look at how this little cutie was created.
Affiliate Disclosure Policy
This post contains affiliate links for your convenience. This means if you make a purchase after clicking a link, I will get a small commission with no additional cost to you as the consumer. Jill Cameron Creations/Jill Lipscomb participates in the Amazon Services LLC Associates Program, an affiliate advertising program designed to provide a means for sites to earn advertising fees by advertising and linking to Amazon.com. For full disclosure policy click here.
How-to: Create Digital Stamp Background Paper
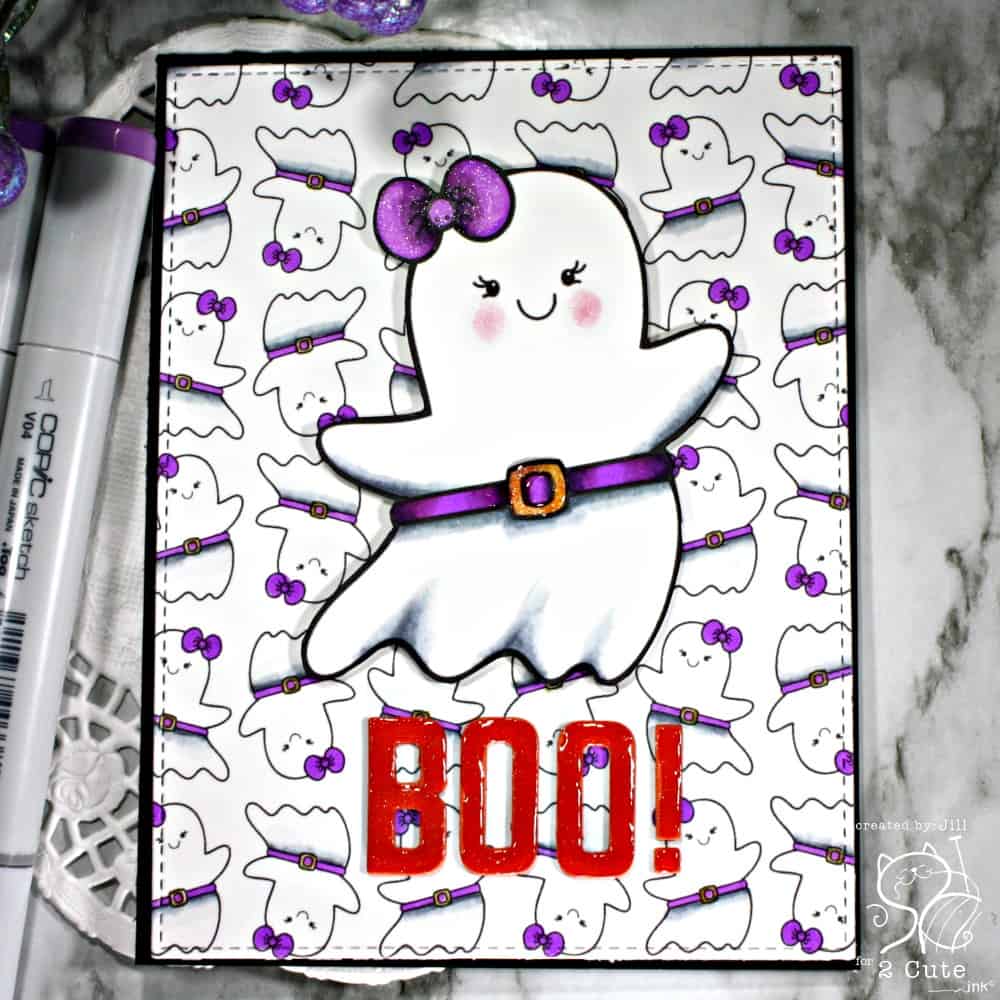
Start with a digital stamp that has clean and simple lines to create a background. Resized detailed digital stamps look fuzzy when made so small. Stick with clean and simple stamps for a background.
In my video (see below) I demonstrate how to create a digital stamp background in Silhouette Studio and PicMonkey. Here are the basic steps so you can try this with any photo editing software you have.
- First, crop the digital stamp to be as close to the lines as possible without cutting any of the image away.
- Then, create a blank document to be either 8 1/2″ x 11″ or 4 1/4″ x 5 1/2″. This will allow you to determine the appropriate size of the digital stamp for the next step.
- Next, resize the image. Remember your card size here. I resized my digital stamp to be about an inch tall.
- Now, position the stamp where you think you want to start and duplicate the image.
- Rotate the second image around until you like how it’s positioned.
- Finally, repeat until the background is completed.
Try creating a digital stamp background in your next project! Be sure to share it with me on social media so I can check your craftiness.
Before you go, check out my other post using 2 Cute Ink digital stamps: Scarecrow Cat.

Use Silhouette Studio with Digital Stamps
Set-up Google Docs for Digital Stamps the Easy Way


3 Comments
Comments are closed.