How-to Correct Copic Coloring Mistakes
Today we’re going to talk about how-to correct Copic coloring mistakes. I make mistakes in my Copic coloring ALL the time. Thank goodness Copic markers are pretty forgiving. Seriously, Copics are a forgiving medium when it comes to corrections. And these tips can definitely take some of the frustration out of Copic coloring.
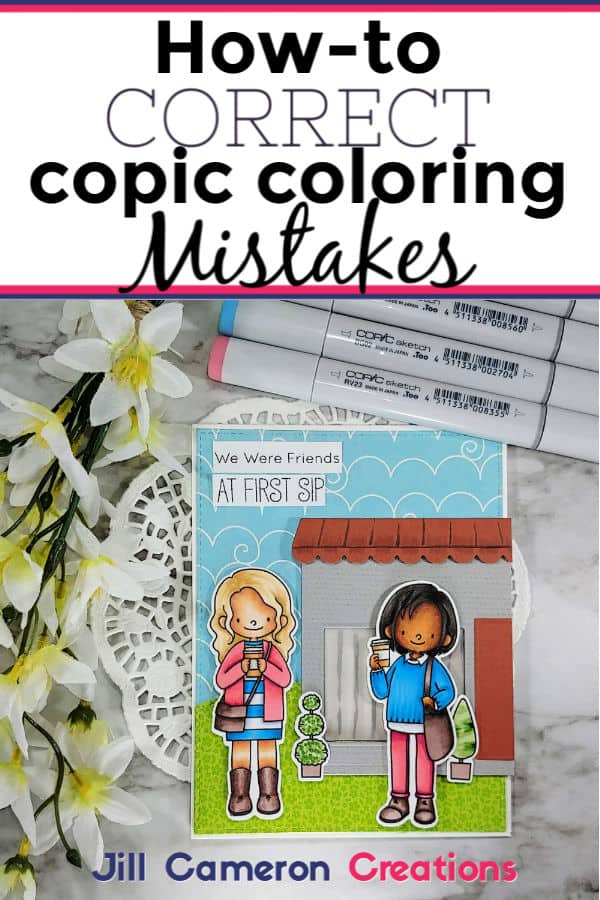
There’s a video to along with this and a complete card. I wanted to demonstrate these tips are practical and not some abstract thing. I used these methods while I was making this card. Actually making this card is what gave the idea to do a blog post on correcting Copic coloring mistakes.
Affiliate Disclosure Policy
This post contains affiliate links for your convenience. This means if you make a purchase after clicking a link, I will get a small commission with no additional cost to you as the consumer. Jill Cameron Creations/Jill Lipscomb participates in the Amazon Services LLC Associates Program, an affiliate advertising program designed to provide a means for sites to earn advertising fees by advertising and linking to Amazon.com. For full disclosure policy click here.
How-to Correct Copic Coloring Mistakes

My first piece of advice when it comes to Copic coloring and correcting coloring mistakes is to finish what you’re coloring. What you see as a mistake halfway through a piece might just be what makes the piece beautiful in the end. Don’t stop in the middle and say it looks terrible and start over. Even if you don’t use the piece you
Important Point
I have the most success with correcting Copic coloring mistakes when I let my project dry before adding more ink to the paper. I always let it dry between fixes. The good thing is, drying happens really quickly! I’m talking like two minutes and it’ll be dry. I know you’ll hear contradictory information on this but I’ve found this works best when it comes to correcting Copic coloring mistakes.
Color Bleeding
Colorless Blender
Colors like Red and Red-Violet bleed VERY easy. You know the color runs outside of the stamped lines. UGH! Every single time I color with either color family, I have color outside of the stamped lines. It’s so frustrating! That’s when the colorless blender comes in handy. The colorless blender is your BEST friend when you are correcting this kind of Copic coloring mistake.
The colorless blender basically bleaches the color out of the paper while pushing the color back to where it is supposed to be. When you use the colorless blender, don’t color in circles. Instead, be sure to start on the outside of the mistake and push the color back to where it should be with more of a flicking motion.
The paper is going to change color from the alcohol on the paper. Let it dry between applications. If you add too much it can make the bleeding color worse.
White Gel Pen
My other little bestie is the white gel pen. I really like to use it when I’m going to die cut the image. It allows super clean edges around the stamped image. Just one thing… Don’t color over white gel pen with your Copic markers. It can ruin the nib. This is something you want to use last. It’s really handy when the colorless blender doesn’t exactly work perfectly. Think about how hard it is to get red out of white when it comes to laundry. This isn’t much different.
Color Correction
Huh? Color correction? What do you mean? So, in the video (linked above) I used a C3, RV21, and RV23. I attempted to use a gray as my shadow color. It wasn’t dark enough and it turned my pink into purple. I love purple but I didn’t want my pink turning purple in this particular case. If you’ll remember, Copic markers are transparent. You can layer colors on top of each other. I went back through my Copic stash and found a much dark pink and added right on top of the C3. Then, I colored everything again. Perfect!
Even Out Coloring
Sometimes a blending family just doesn’t turn out exactly right or you don’t have the exact right markers. What to do? Easy. Build up the color. In the video, I wasn’t happy with how the teal sweater turned out. First, I let it dry! Then I went back in with my lightest color (which is the one I wasn’t very happy about) and went back over the entire area. This allowed the colors to blend a little more seamlessly while still retaining the shaded areas. By letting it dry first, I reduced the chances of bleeding and still retained the detail of my shading.
Next time you sit down (or stand up) to Copic color keep in mind my two suggestions: let it dry before making any changes and finish your project instead of stopping due to a mistake. Keep the colorless blender handy and use the transparent nature of Copic markers to correct Copic coloring mistakes. Remember, a good white gel pen is your friend and can clean up the outside edge of a stamped image quick as a snap.


See more Copic Coloring:
How To Easy Copic Flower Mother’s Day Card
Frightfully Sweet One Layer Card
Beach Bum Card


2 Comments
Comments are closed.