How-to: Gate Fold Card & Cheat Sheet
A gate fold card is a simple way to add dramatic impact to any card. I had never made a gate fold card before today. That tells you how simple it is. Basically, it’s two card bases put together with the front of each card folded back onto itself. Pretty simple right? And the best part about a gate fold card is there are soooo many ways to make them.
I’ve noticed there aren’t many places to get the measurements for gate fold cards or any other DIY interactive card so I’ve made a cheat sheet for you! Grab your cheat sheet before you leave!
Links to the products used are below. Some links are affiliate links which means I get a small commission from your purchase at no additional cost to you. This is how I pay for my stamps, inks, and tools for content on my website. Full disclosure here. Thank you for your support.
How-to: Gate Fold Card
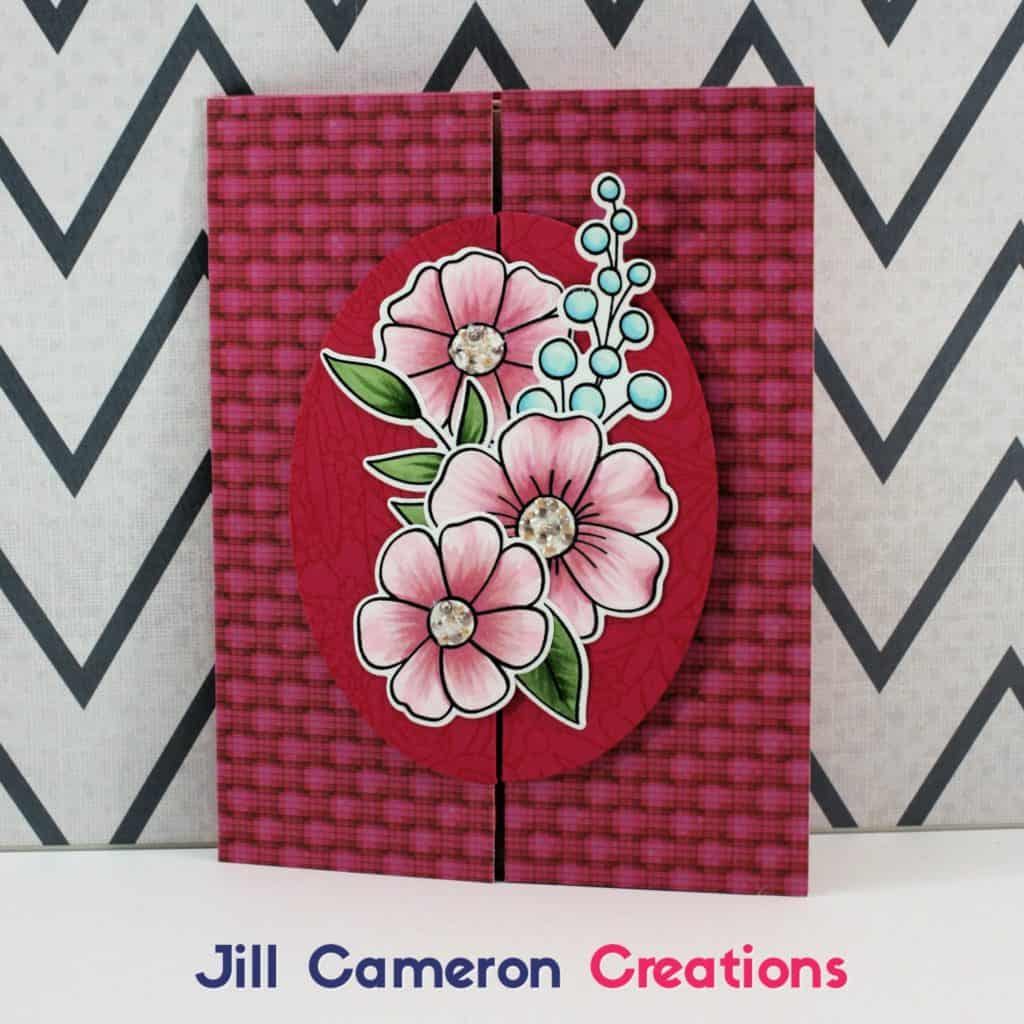
Creating a gate fold card is really simple. Just cut two card bases. If you want a portrait card then, start with card bases that are 5 1/2″ x 8 1/2″. Cut 4 1/4″ x 11″ if you want a landscape card. Of course, you can orient the card any way you want. After all, it is your card. Since the measurements for the card are on the cheat sheet, I’m going to talk about how I created the rest of the card.
Front flaps
You can die cut the front flaps of your gate fold card pretty easily. It’s called partial die cutting and it’s pretty simple. If you’ve never done partial die cutting before, I would recommend using some scrap paper first to practice on. Partial die cutting depends on the placement for the cutting plates in relation to the die. If you cover only half a die with the top cutting plate, only half of the die will cut. Makes sense right? Watch my video for a demonstration on how to set up your plates and paper for partial die cutting.
I added some extra WOW to my card by adding die cut and colored images to the front flaps. It appears that the flowers are on both halves of the card front but the flowers are adhered to the left side of the front. I arranged the images on the card front then used Glad Press n Seal to pick up the images as a single group. Just add some liquid glue under the edges of each image and tada you have a cluster! Now, add dry adhesive to one side of the image cluster and add it to the one flap. Be sure to flip it over and check for any stray adhesive that might cause it to stick to the inside of the card or the other flap.
Also, I mentioned in my video my inventory system using Evernote. Check out this blog post Inventory System for Stamps and Dies. There’s also a FREE tutorial on how to set up Evernote in the Welcome emails.



One Comment
Comments are closed.